Photo laser engraving with dithering
A photo on wood, leather or slate – a diode laser does this surprisingly well. The key is preparing the image properly. BeamSketch shows you right on the canvas what the result will look like.
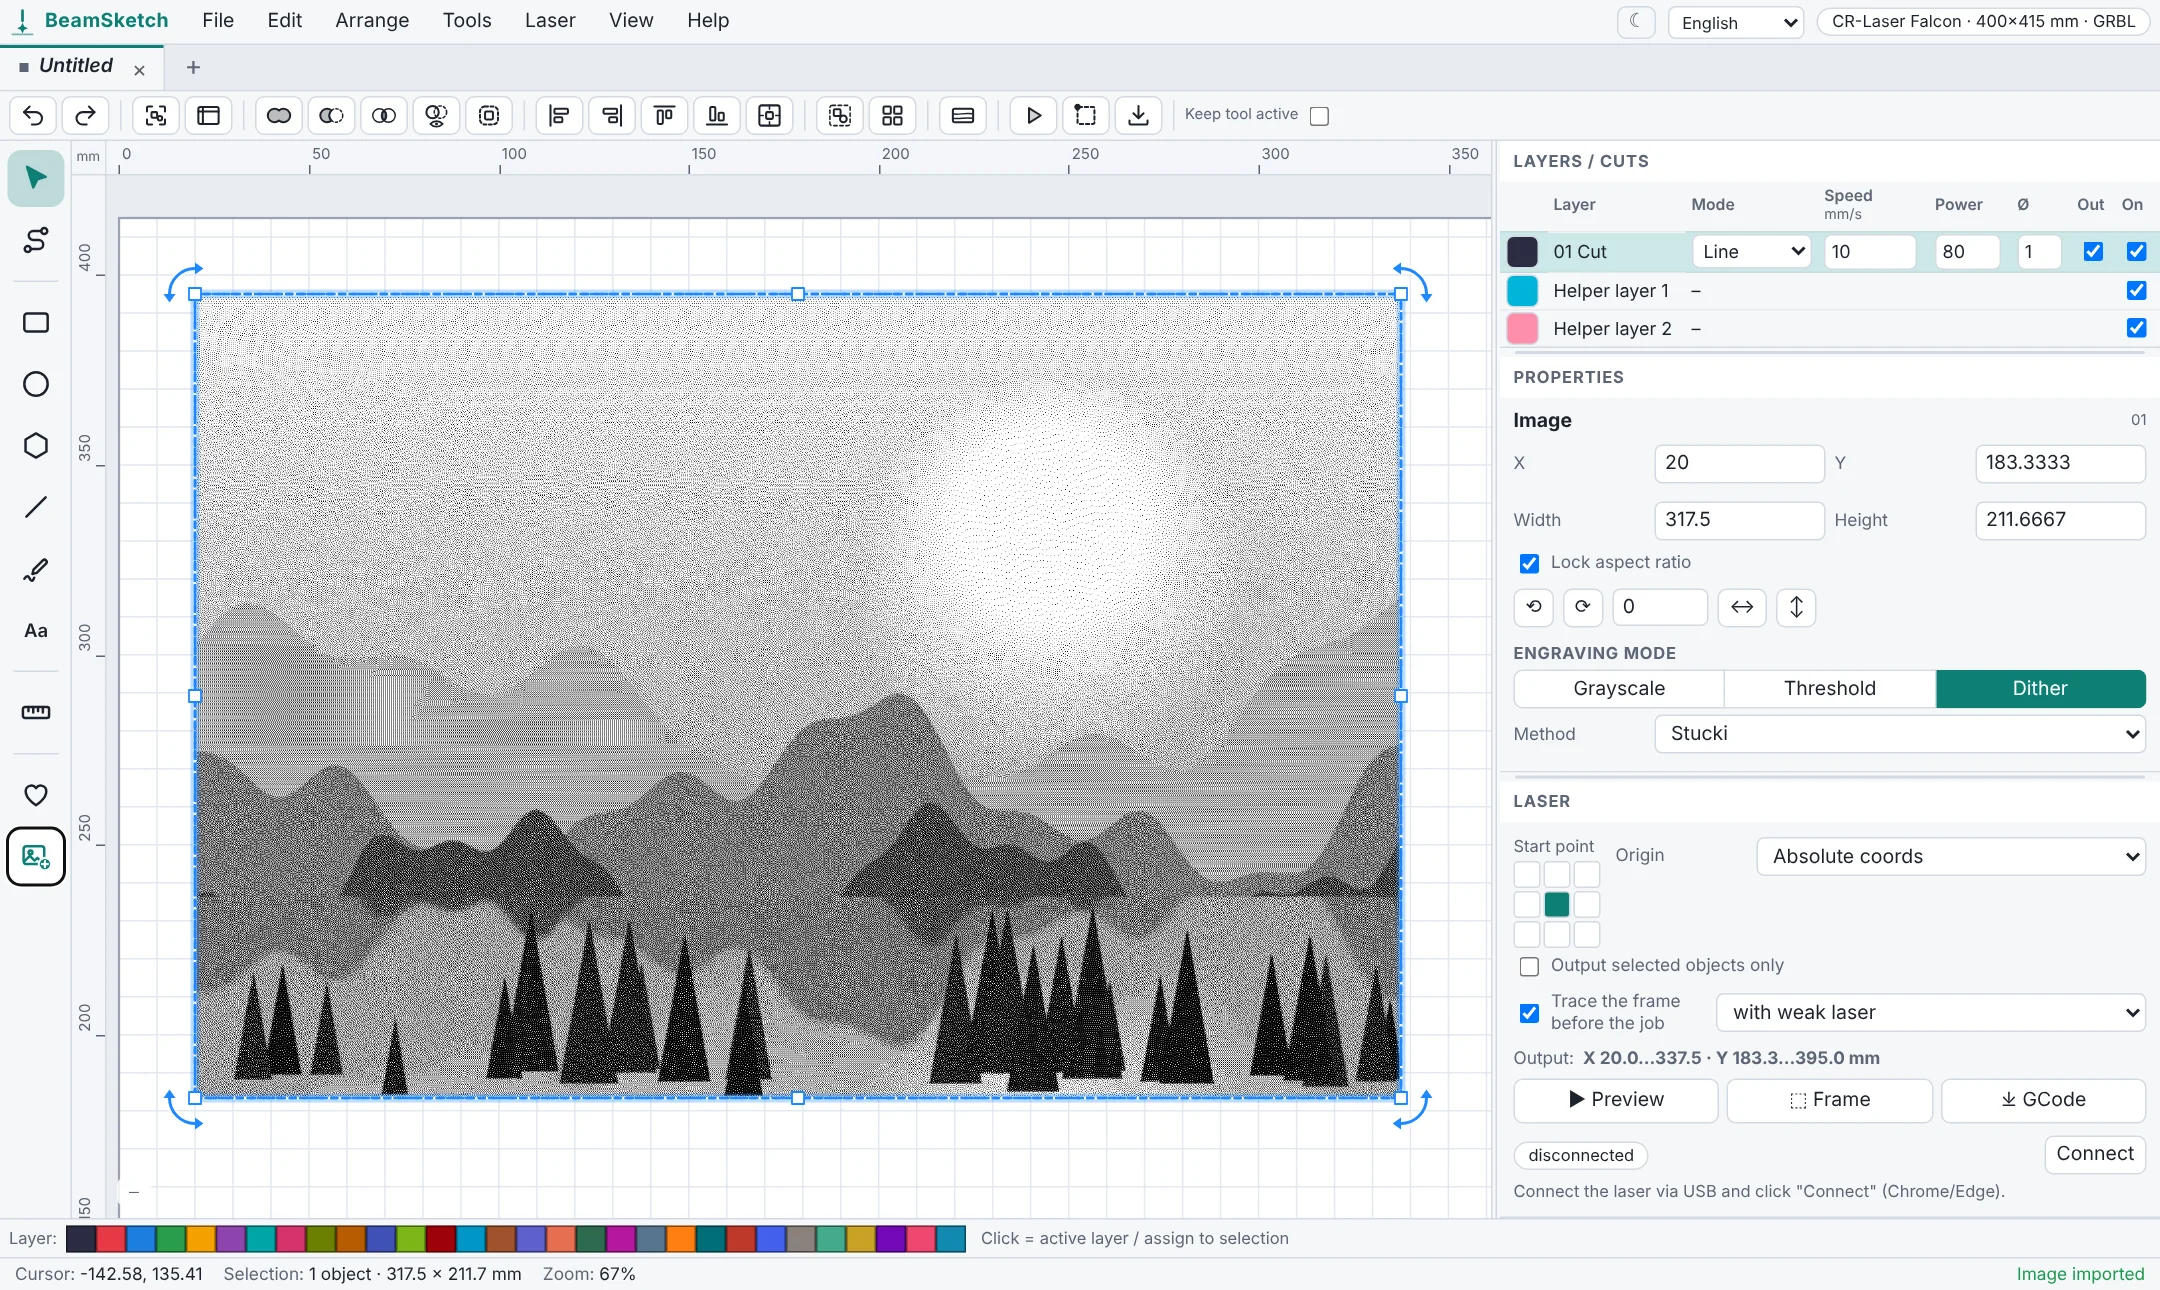
How to engrave a photo
- Open BeamSketch and drag your image into the window (PNG, JPG, WEBP, GIF or BMP) – or use File → Open.
- Choose the engraving mode on the right: grayscale, threshold or dither.
- Adjust brightness, contrast and gamma – the canvas updates instantly.
- Set the layer to “Fill” with a suitable line interval, check the preview and start.
Which mode for what?
| Mode | Good for |
|---|---|
| Dither (Stucki, Floyd–Steinberg, Jarvis, Atkinson, Sierra, ordered) | photos on wood – gray tones become fine dots, very reliable on diode lasers |
| Grayscale | smooth gradients on materials that react evenly to power |
| Threshold | logos and line art – pure black and white |
Tips for good results
- Boost the contrast: wood is darker than paper, so engraved photos often look flat – a bit more contrast and brightness helps.
- Match the line interval to your laser spot: BeamSketch shows the image resolution and engraving DPI and warns you if the layer is set to “Line”.
- Remove the background: “Background…” in the image properties makes a plain background transparent.
- Rather trace it? For logos, “Trace” is often better: the image becomes vector lines you can cut.
- Material test: “Tools → Create material test” helps you find the right power and speed for your wood.
Start now – no sign-up
Free, runs right in your browser.